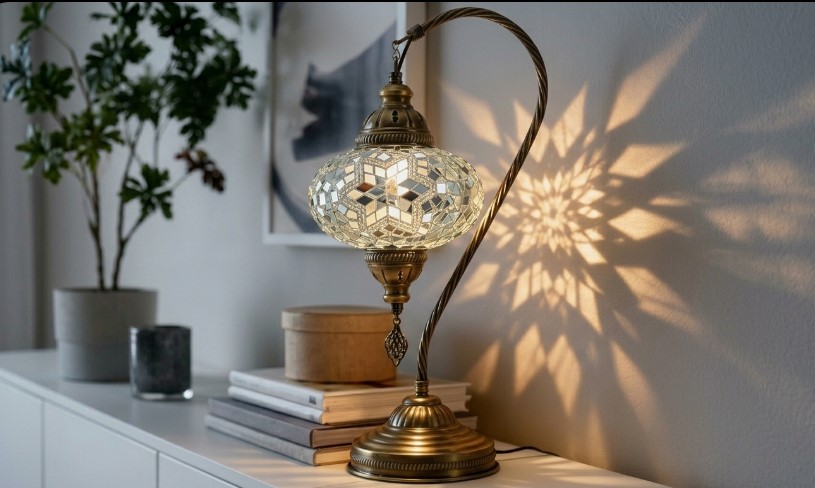
How to Create Turkish Mosaic Lamps
A Step-by-Step Guide on How to Create Mosaic Lighting.
The Art of Creating Turkish Lamps.
Turkish lamps have a unique quality to them, especially in the way that the colored glass may catch the light and reflect beautiful designs throughout the room. Turkish lamps are not only functional in a room, but they also represent a long history of artistic creation. If you've ever thought about how to create Turkish lamps, then you will soon realize that this is an area of artistry that requires creativity as well as patience and precision.
Unlike factory-produced lamps, Turkish mosaic lamps are constructed with many small pieces of glass forming a larger design, thus they create a unique ambient glow that feels very personal and timeless. Whether it be for a new hobby or to give your home or any space more of a personalized touch by creating something unique, creating Turkish lamps will be an incredibly rewarding experience.
The Basic Structure of a Turkish Lamp
Before starting, it's good to have a basic understanding of what the structure looks like. A typical Turkish lamp consists of three primary components:
1. A glass globe or base: (the surface on which you will create the mosaic designs),
2. A metal frame (typically constructed from brass or bronze) that supports the globe,
3. A light source: (usually a small bulb that illuminates the design).
The most important feature of the lamp is the mosaic itself, which is usually constructed from many small colored pieces of glass, which have been assembled in either a geometric or floral design, usually influenced by the Ottoman period.
Materials and Tools Required to Make Turkish Lamps.
If you truly want to learn how to create Turkish lamps, the first step is to obtain the correct materials for the job. Most of the items you will need are easily obtainable and can be worked with without too much difficulty.
The following are necessary items:
A glass globe or jar that is completely clear;
Colored pieces of mosaic glass;
Glass beads (optional for added texture);
Adhesive (glass glue or silicone;
Grout (white works best);
Sponge and rags for cleaning;
Gloves for protection.
Lamp kits, such as those at www.lamps4u.shop, are also available and are good options for those just learning how to create Turkish lamps while still allowing for creative expression.
When designing your unique pattern, the first step is to outline your globe/jar before beginning the process.
Begin with a simple sketch on the glass for reference points; identify where you will be placing glass pieces and any guidelines you wish to utilize in your pattern, such as:
stars and geometric shapes;
daisy-type flowers;
symmetrical and repeating patterns.
It is important to practice with simple patterns before advancing to more complex designs. However, every pattern must be symmetrical and equal in space and balance.
To Create Your Lamp:
1. Preparing the Glass Surface
Thoroughly clean all surfaces of glass to remove dirt or grease. The cleaner the surface, the better your glue will adhere, therefore providing you with a smooth, non-bumpy finish.
2. Applying The Mosaic Glass Pieces
Once you have prepared the glass, apply an even coat of glue to the backside of your colored glass pieces and place them onto the glass surface; work in small sections so that you can have more control over the position of your pieces.
A little bit of glue goes a long way. There should be small gaps between each piece to accommodate the grout.
The key point is that this part of the assembly process is going to take you a lot of time, but speed is not the goal; precision is.
3. Adding Glass Beads
For additional detail and textural contrast, you can add small glass beads between the mosaic glass pieces that you have applied; adding the beads will create a more traditional look for your Turkish lamp.
4. Allowing material to set
It is important to let the adhesive fully cure before grouting the pieces together.
5. Grouting the material
Cover the entire surface with grout, and force the grout down into all gaps between the glass. After the grout has been applied:
Use a damp sponge to remove excess grout from the surface.
Gently clean the surfaces of all the pieces.
Follow the manufacturer’s instructions for curing time.
Grouting is what holds the design in place and also gives the overall pattern by outlining each piece of glass.
6. Final cleaning and assembly
When the grout has fully cured, buff the surface with a soft cloth. Attach the glass globe to the metal support, and add the light bulb.
Your one-of-a-kind Turkish lamp is now ready to be enjoyed.
Practical Tips for Getting the Best Results
The more you practice, the faster you will get better at making Turkish lamps, but there are some techniques that you can use to improve your results now.
Take your time. Rushing will create uneven patterns.
Use complementary colors. Stick to 1 color scheme to unify your design.
Test your lighting. Insert the light bulb from time to time to see how well the colors work together in real life.
Keep your equipment free of any residue. If your tools are not clean, they may not adhere properly or look their best.
Making small adjustments as you go can greatly influence the final result.
Why Handmade Turkish Lamps Have Character
There is a special kind of charm to making something by hand as opposed to using mass-produced products. The imperfections of a handmade Turkish lamp create its individuality and character when compared to other products produced by a machine.
Each glass piece serves as a different reflector of light. This creates a soft, ambient light that will vary with different angles and brightness of the light source. The reason for that dynamic quality is what draws many people to this type of lamp as part of their home decor; they not only illuminate, but are able to change how you feel about a space, too! There are typical challenges with these types of crafts for beginners, such as:
Uneven spacing (using guidelines) - glue marks (using less adhesive) - dull finish after grouting (clean well after grout has set) - loose pieces (properly drying before handling). All these challenges are just part of a learning curve that you'll grow out of with practice.
Another thing to remember is that making Turkish lamps is not simply going through a step-by-step process; it's also about living the process of creation and being part of a tradition. When selecting colors, aligning and assembling each tiny piece of glass, etc., you'll be offered opportunities to slow down and concentrate on each stage of creation.
Ultimately, the completed lamp represents not just your contribution to what we generally think of as a lamp, but also represents your artistic decisions and effort. A handmade Turkish lamp will tell its own story, which is simply not the same as purchasing from a store.
With a little bit of patience, having the right materials, and being imaginative, you can create lasting memories through the use of simple materials such as glass and light.